One of the questions I get asked most often is how I got into underwater photography. It’s quite a niche hobby when you think about it, but for some reason, my journey to this point felt very natural and organic.
The Beginning
When I was 13 years old, I got scuba certified in Austin, Texas. It happened before we headed out on a cruise to Mexico. We went on a few other dive trips after that to practice our new skills, but honestly, that was about it. For years, diving stayed a fun, family activity that we’d do on vacation, nothing more. It wasn’t until I got older and started to travel more (post-COVID) that I remembered I already had my scuba certification and could start putting it to more use.

When I made that realization, I also decided that a GoPro wasn’t going to cut it for me anymore. So, I decided to pull the trigger on a used Ikelite housing kit on eBay. And voila, I became an underwater photographer.
I signed myself up for an underwater photography workshop, eventually got my advanced scuba certification, and I took every opportunity I could to practice my skills shooting in underwater settings.
Time to Learn!
But if you’re reading this and thinking, “That sounds amazing, but I have no idea where to start,” don’t worry. The rest of this blog post is all about how you can get started with underwater photography — no matter your experience level or budget.
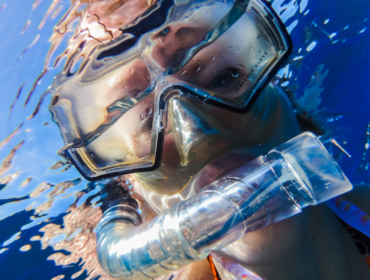
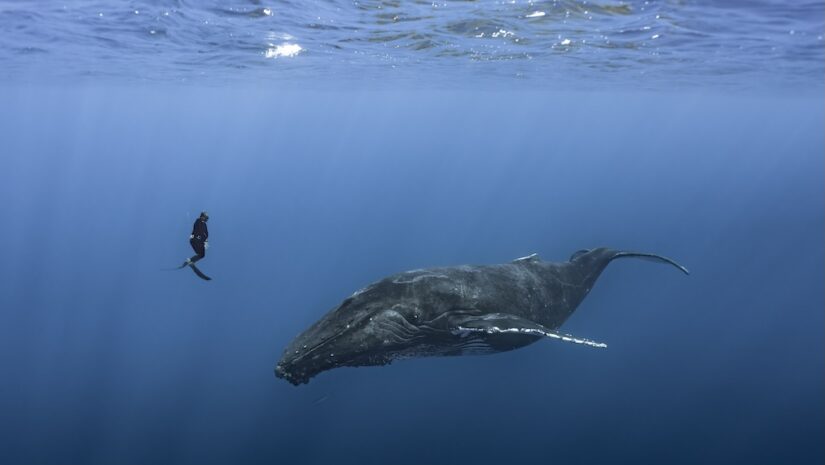
Step 1: Get Comfortable in the Water
This one might sound obvious, but it’s actually the most important step. Before you even think about bringing a camera underwater, make sure you’re completely comfortable being there.
Whether you’re scuba certified, freedive certified, or even just a casual snorkeler, none of that actually matters unless you’re comfortable in the water. You should feel relaxed and capable of moving around naturally before you introduce a camera, because once you add a camera, buoyancy, framing, and body awareness all become extra variables that can easily overwhelm you if you’re not already confident underwater.
Make sure to take your time with this step and go through with any certifications you may need to feel fully comfortable in the water. The photography part will come much easier after that!
Step 2: Start with an Action Camera
Once you’re comfortable in the water, it’s time to bring a camera into the mix. If you’re completely new to underwater shooting, I recommend starting with a simple action camera — like a GoPro, DJI Osmo Action, or Insta360 Ace Pro.
Pair it with a floaty stick or a wrist strap so you don’t lose it, and focus on getting used to the feeling of shooting underwater: how light behaves differently, how your movements affect composition, and how subjects like fish or bubbles move in unexpected ways.
You’ll learn a lot just by playing around and experimenting. Don’t worry about gear perfection, this stage is all about practice and working with a camera underwater.
Step 3: Level Up With a Housing
Once you’ve mastered the basics and want more creative control, it’s time to upgrade. This is where things can get expensive, so I recommend taking it slow and doing your research.
My very first underwater housing was a used Ikelite setup I bought on eBay. It served me well for almost four years before I upgraded to a Marelux housing — which I plan to keep for many years to come.
If you’re just getting into more serious underwater photography, here’s a quick breakdown of housing options by tier:
Budget underwater photography gear: Seafrogs plastic housings, starts at $850+ for a full kit
I have many friends who use Seafrogs plastic housings and they absolutely love them. They get the same professional results as me with a different housing. However, with some minor limitations to button/feature access on their cameras.
Mid-range underwater photography gear: Seafrogs aluminum housings, starts at $2,500 for a full kit
Seafrogs only recently came out with their line of aluminum housings. These are extremely comparable to the high-end housings I’ve listed below, except at a fraction of the price. I have not personally used this housing to confirm whether that’s actually the case. However, based on the housings I’ve seen and held, the build quality of this aluminum housing feels very similar to my Marelux. This is definitely a great option to look into.
High-end underwater photography gear: Marelux or Nauticam housings, starts at $5,500 for a full kit
I recently upgraded from my Ikelite housing to a Marelux housing and it has been absolutely life-changing so far. So, I now have access to almost 100% of the buttons/functions on my camera! I absolutely love how easy it is to navigate my camera settings with the new housing. Marelux is a newer and smaller housing company. However, the housings are extremely similar to Nauticam at the top of the line, for a lesser price.
What you ultimately choose will depend on your camera, your dive depth, and the kind of subjects you want to photograph — whether that’s macro life on a reef, big pelagic animals, or something in between. Take your time, do the research, and you’ll be on your journey in no time!
Final Thoughts
Underwater photography is one of the most rewarding forms of creative expression I’ve ever experienced. It combines technical skill with patience, curiosity, and a deep appreciation for the ocean.
Looking back, I realize that my passion for photographing life beneath the surface has always been there — it just took me a little time (and a few embarrassing pool photos) to recognize it.
If you’ve ever dreamed of capturing the underwater world for yourself, start small, stay safe, and keep learning. You might just fall in love with it the same way I did.
Have questions about getting started or my current camera setup? Drop them in the comments, I’d be happy to help!