There’s a lot to think about during a scuba dive — checking your gauges, keeping close to your buddy, staying within your limits, etc. But there are things to consider before you even start the dive. Like, how are you going to enter the water? It’s important to think about the best and most suitable way to enter the water for a dive, based on the water conditions and dive site. If you are diving in a place with strong surface currents and big waves, the best option is probably a negative entry, or negative buoyancy descent as it is also known.
So what is a negative entry, and how do you do it like a pro?
2 ways to enter the water for a dive
Before we go into the details of a what a negative entry is, first let’s look at the two main ways that scuba divers enter the water to start a dive:

1. The giant stride:
After putting on all of the gear you need for the dive, you stand on the edge of the boat or dive site entry, facing the water. With your BCD mostly inflated (not completely full, but enough so that you’re positively buoyant at the surface), you hold your weight belt with your left hand (to ensure it doesn’t open and fall off during impact), and you use the palm of your right hand to hold your mask and regulator in place on your face (to ensure you don’t lose them when you hit the water). Next, you look out towards the horizon and take a giant stride forwards into the water.
When you bob back up to the surface, fully inflate your BCD, remove the regulator from your mouth and put in the snorkel if necessary, and signal “OK” to the people on the boat/shore. This technique is suitable for diving from bigger boats, or places where there is a drop to the water.

2. The backwards roll:
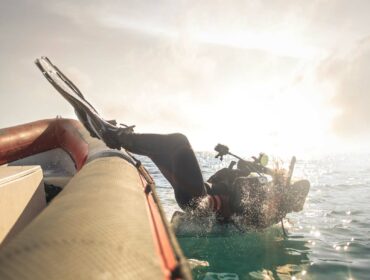
This technique is better for diving from small boats such as Zodiacs. After donning all equipment, you sit on the edge of the boat, with the water behind you. Hold your weight belt with your left hand, hold your mask and regulator in place with your right palm (for the same reasons as for the giant stride). With a mostly full BCD (not completely full to reduce harsh impact), you fall backwards into the water. When you bob back up, inflate fully, remove the regulator and put in the snorkel if necessary, and signal that you are “OK”.
What is a negative entry and why would you use it?
You can adapt the above techniques to enter the water so that, instead of bobbing back up when you hit the water, you actually descend down immediately to start the dive. This is called a negative entry (negative buoyancy descent).
A negative entry is used when diving in a place where there are surface currents or very choppy waves. In dive conditions like these, it is easy to separate from your dive group or buddy if you stay on the surface to wait for them. So the best option is to descend immediately and quickly, and meet deeper under the water where it is calmer and easier to see each other.
In a light-to-moderate current, it is an option to hold onto a surface line while waiting for the rest of the group to jump in and gather together before descending. But with stronger currents and big waves, this option can be uncomfortable or even dangerous. Also, the boat captain will have less control of the boat in conditions like these and that can also be dangerous with divers in the surrounding water. A negative entry allows all divers to jump in at the same time, descending quickly to avoid these surface hazards in high seas. It’s important to decide in advance which type of entry is most suitable for the conditions that day.

How to perform a negative entry: 7 steps
1. Gear up
Put on all of the equipment you need for the dive; wetsuit, boots, fins, mask, snorkel, tank, BCD, regulator, and anything else you want to take. Don’t forget to do a buddy check. The last thing you want is to jump into choppy water for a negative entry and then realize you haven’t opened your air tank!
2. Hold mask, regulator, and weight belt in place
As mentioned above, it’s important to hold your mask and regulator to your face as you enter the water. If your mask falls off on impact then your dive is already over before it begins. Same goes for the weight belt… you can’t get far without it.
3. Deflate, jump/roll, and then exhale
Depending on the dive site and type of boat, you will either perform the giant stride or the backwards roll technique. This should be agreed on in the dive briefing beforehand so that everyone knows what they are doing. Whichever way you decide to enter the water, you need to make sure that your BCD is empty. You should have already done a buoyancy check previously so that you know your perfect weighting. With proper weighting you will still be able to float on the surface with an empty BCD, while breathing normally. If you sink too easily, consider taking some weight off.
To perform a negative entry, you do not need to add extra weight to get down fast. You only need to exhale as you hit the water, and if properly weighted, this should be enough to bring you down under the water.
4. Position your body
When you hit the water, exhale and start to descend. You want to get your body straight, and tuck your arms in close. You can either be head up, with your feet pointing down, or head down with your feet pointing up. It doesn’t matter which, as long as you are streamline. With your legs up, you will be able to kick a little to help you get down faster. Some people find this a little disorienting, so do whichever you feel most comfortable with.
5. Equalize often
This step is important. Your ears should always be a high priority on all dives. But with a negative entry, there is a lot to think about and you are descending fast. It’s easy to forget or delay equalization and this could lead to problems. You could strain or damage your ears, which can cause swelling and might make it impossible to equalize and get deeper. This will mean your dive is unfortunately over very prematurely. Worst case scenario, you could even cause long-term damage.
So as soon as you hit the water, you should equalize your ears straight away. Then, continuously equalize them at a minimum rate of one equalization per every three feet (one meter). You should be equalizing before you really feel that you have to, not when you start to feel intense pressure or pain.
6. Check gauges
Again, with so much to think about it can be easy to accidentally go deeper than you’re supposed to. Make sure to keep an eye on your depth gauge to check that you’re not too deep. If you are descending too quickly, add some air to your BCD on the way down.
7. Locate buddy/group quickly
You should have agreed on a depth to meet at after the negative entry — usually around 30ft (10m) or however deep you need to get below the strong surface currents. When you get to this depth, adjust your buoyancy accordingly so that you are neutral, and locate your group and/or buddy. Make sure that everyone is present, and then you can continue with the dive plan.

Things to consider before a negative entry dive
Before any dive there are things to consider and double check, but for a negative entry dive, you have to make sure everything is in place to allow the descent to go smoothly and safely.
Here’s some questions to ask yourself both in advance and right before jumping:
Equipment check questions:
- Have I performed a buoyancy check to know my perfect weighting?
- Do I have all of the equipment I need for the dive? Including any extras such as camera, tank banger, flashlight, dive computers, gloves?
- Is my tank full and open before jumping in?
- Am I streamline before jumping in?
Dive plan questions:
- Which depth will the group meet at?
- Who is my dive buddy?
- Who is leading the dive?
- Which part of the boat will we be jumping from?
- How do we make sure we are all ready to jump at the same time?
A well known scuba diving phrase to remember is: Plan the dive and dive the plan!
Practice before doing it
Just like with anything tricky, it’s good to practice beforehand, in a calm, no-pressure environment, so that you are more prepared on the day.
A negative entry requires a high level of multitasking and concentration. Jumping into strong currents and big waves and instantly descending (potentially upside down!) can be stressful for even the most experienced of divers.
We recommend practicing a negative entry at a dive site that has nice conditions if possible. This way if anything doesn’t go to plan, you can simply surface, and try again.
Remember the seven steps when you’re practicing, go over the different entry techniques, think about your equipment and your body position, and do not forget to equalize your ears often.
It may take a few tries until you are completely comfortable, but eventually you will feel ready for the real deal.
Don’t rush
We recommend being an advanced level scuba diver or above before thinking about doing a negative entry dive.
It’s important to feel confident in your basic dive skills, such as buoyancy, clearing the mask, and safety procedures, before adding extra skills, including those required to perform a negative entry. Don’t overwhelm yourself by going too fast for your level.
Your local dive school or instructor can advise you on whether they think you are ready. They will also let you know which dive sites near you might require a negative entry.
Now you know how to perform a negative entry like a pro, we hope you’ll feel confident when you try it on a dive.
Written by: Charlotte Stringer


